728x90
반응형
SMALL
- 라이브러리 추가
https://poi.apache.org/download.html#POI-4.1.0
위의 사이트로 가서 poi-bin 압축파일 최신버전을 다운로드 받습니다.
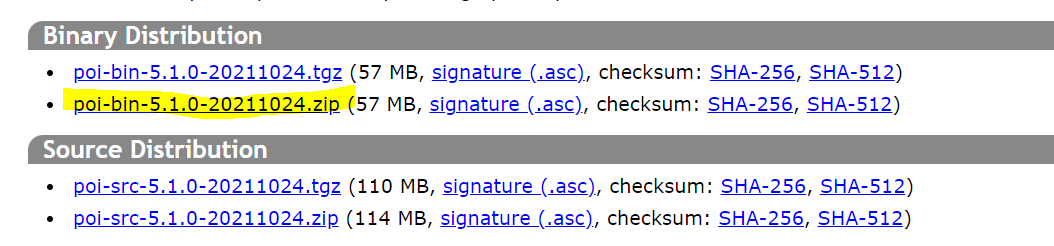
다운로드 후 압축을 풀어, poi-5.1.0.jar 파일을 추가하면 됩니다.

간단히 추가하기 위해서 poi-5.1.0.jar 파일을 앱 프로젝트 폴더 내로 옮겼습니다.
libs 폴더를 하나 만들어 옮겨줍니다.

그 후 안드로이드 스튜디오내에서, 오른쪽 클릭 하여 Add As Library하여 추가합니다.

그럼 gradle 파일에 추가된 것을 확인할 수 있습니다.

- saf로 파일 생성 하기
엑셀 파일을 생성, 저장하기 위해 saf를 사용합니다.
    @SuppressLint("SimpleDateFormat")
    fun exportExcelData() {
        val now = System.currentTimeMillis()
        val date = Date(now)
        val sdfNow = SimpleDateFormat("yyyyMMddHHmmss")
        val formatDate = sdfNow.format(date)

        saf("data_$formatDate.xls")
    }
현재 날짜를 파일이름으로 하였습니다.
    private fun saf(fileName: String?) {
        try {
            /**
             * SAF 파일 편집
             */
            val intent = Intent(Intent.ACTION_CREATE_DOCUMENT).apply {
                addCategory(Intent.CATEGORY_OPENABLE)
                type = "*/*"
                putExtra(Intent.EXTRA_TITLE, fileName)
                putExtra(Intent.EXTRA_ALLOW_MULTIPLE, true)
            }
            startActivityForResult.launch(intent)

        } catch (e: java.lang.Exception) {
            e.printStackTrace()
        }
    }

    private var startActivityForResult = registerForActivityResult(
        StartActivityForResult()
    ) { result: ActivityResult ->
        if (result.resultCode == RESULT_OK) {
            val uri = result.data?.data
            if (uri != null) {
                exportExcel(uri)
            }
        }
    }
파일 탐색기가 열리고, 폴더를 직접 선택하여 저장할 위치를 선택, 그 uri를 받아옵니다.
- 엑셀 기록
파일 생성을 위해 디스크립터, 아웃풋 스트림을 열고,
엑셀파일의 Workbook을 생성하고, sheet를 생성하고, row를 생성하여 기록하면 됩니다.
   //Export
   private var pfd: ParcelFileDescriptor? = null
   private var fileOutputStream: FileOutputStream? = null

   private fun exportExcel(uri: Uri) = CoroutineScope(Default).launch {


        val wb: Workbook = HSSFWorkbook()
        val sheet: Sheet = wb.createSheet()

        val now = System.currentTimeMillis()
        val formatDate = SimpleDateFormat("yyyy-MM-dd HH:mm:ss").format(Date(now))

        val dayRow: Row = sheet.createRow(0)
        dayRow.createCell(0).setCellValue(formatDate)

        try {
            pfd = contentResolver.openFileDescriptor(uri, "w")
            fileOutputStream = FileOutputStream(pfd!!.fileDescriptor)
            wb.write(fileOutputStream)
        } catch (e: Exception) {
           // Util.showNotification("error: ${e.message}", "error")
        } finally {
            try {
                wb.close()
                fileOutputStream?.close()
                pfd?.close()
                //Util.showNotification("저장 되었습니다.", "success")

            } catch (e: Exception) {
                e.printStackTrace()
                //Util.showNotification("error: ${e.message}", "error")
            }
        }

    }
createRow 파라미터는 행번호,
createCell 파라미터는 열 번호입니다.
cell의 setCellValue()를 이용하여 값을 입력하면 됩니다.
다만 Double, String, Boolean은 입력되지만 정수는 안되어 double형식이나 string형식으로 넣어주면 됩니다.
다음과 같이 사용하였음.
val wb: Workbook = HSSFWorkbook()
val sheet: Sheet = wb.createSheet()
val samplingRateRow = sheet.createRow(1)
samplingRateRow.apply {
      createCell(0).setCellValue("samplingRate")
      createCell(1).setCellValue("${viewModel.fs.value}")
}
val filterRow = sheet.createRow(2)
filterRow.apply {
      createCell(0).setCellValue("필터")
      createCell(1).setCellValue("Band-Pass Filter 25~125Hz")
}
728x90
반응형
LIST
'Android > Function' 카테고리의 다른 글
| [안드로이드] scrcpy를 사용하여 화면 미러링 하기 (0) | 2022.02.03 |
|---|---|
| [안드로이드] Bitmap 사이즈 줄이기 (0) | 2021.12.15 |
| [Android] Room + RxJava 정리 (0) | 2021.11.11 |
| 안드로이드 Manifest intent-filter 동적으로 비활성화하기 (0) | 2021.07.01 |